Month: August 2010

  • A Bad Day in Phoenix is a Good Day to Test the iPhone

    Friday was a state furlough day. While the school were still operating, the entire machinery of the state of Arizona was closed (and unpaid, of course, that was the whole point.) With nothing to do and no family around, I was going to attend to miscellaneous tasks around the house – until the air conditioning died late Thursday night. Summer is running long this year and it’s still well over 100 every day. Air conditioning repair companies are swamped and it’s nearly impossible to get a good technician to look at a dodgy unit on short notice. We have a reliable company that we use and they were able to get someone out towards the end of the day Friday.

    The practical upstart of the whole situation is that I needed to abandon the house for the entire day and could not retreat to the office.

    I decided I was going to try two things:

    • First, make a movie with the iPhone and the iPhone version of iMovie. I had tried this on the day I got the phone, but made a horrible mess of it. I was unable to cut and assemble the scenes as needed and learned I needed to adjust my shooting style, and
    • Go to as many Apple Stores as necessary to get an iPad Camera Connection Kit, which is never in stock. I figured I’d probably have to go to all of them and still not get one. Of course, I could have called, but how would that kill an entire day?

    With nothing more than that in mind, I headed off on my trek.

    I did vaguely attempt to make a few different types of shots, such as close-ups, using both the front and back camera, using the video light, moving shots, walking talking shots, etc. From my first attempt I also knew not to cut the shots too close. You want plenty of pre-roll and post-roll footage, as I didn’t have much luck with frame accurate editing.

    After spending the day taking a series of mostly extemporaneous shots as the mood hit me, I came back home – and while suffering still without A/C, I set about editing it with the iPhone iMovie app.

    A lot of people have remarked how wonderful it is, but to me, it’s extremely restrictive and difficult, suitable for 5 or 6 shot, “cuts only” editing. Trying to string together 15-20 shots from a collection of 25-30 is tough. Let’s start with the work flow. Let’s assume we’ve already shot the footage and it is (obviously) on the phone.

    You start by creating a project. Currently there are four themes and you cannot choose “none” although if you don’t use any theme elements, you essentially have chosen none. You cannot combine elements from one theme with elements from another (exception: the music) As far as I can tell the theme dictates only three things – the titles, the transitions and the music.

    Once you have a new project, you can start dropping things in. Select new video media and your library of video is shown, as film strips, in reverse order. If you’ve shot your program linearly as I did, you scroll to the bottom, find your clip and tap it – it’s tossed into the project at the end of the clip that’s currently on the “playhead”. Note: it doesn’t place the clip AT the playhead, it skips to the end of that clip and places the new clip. There is no insert/overwrite editing.

    There is no way to inspect the clip in the bin before placing it, and there’s no information, not even the name, provided, meaning you have to guess what clip you want based on the opening frames. In “Bad Day in Phoenix” I shot mostly in order and deleted outtakes before editing. if it had been many shots with similar locations, a slate would have been essential. Just the ability to preview the clip before inserting it would be very helpful.

    Clips are automatically placed with a .5 second crossfade. You can double click the transition placed between the clips and change the duration or change to a simple cut or the “theme’s” transition.

    Trimming the clip is achieved by taping the clip once, then grabbing the pin at either end and sliding in or out. It’s not very precise and doesn’t play audio so it’s hard to line up shots. I found it difficult to trim the shots the way I wanted.

    The program is not without bugs, too. Sometimes clips wouldn’t play their audio. On the next pass they would. Since everything was shot on the phone, it shouldn’t be an incompatibility with the clips. Nonetheless, one clip never played audio and didn’t even render with audio and I had to delete it from the movie. The clip plays just fine, with audio, in the phone’s photo application.

    Titles are placed over a single clip, and seem to run the entire duration of the clip (minus transitions). You have three kinds, opening, middle and closing. Essentially opening and closing are title cards and middle is roughly a lower third. You cannot position them to start at any location than the start of a clip. Nor can I find any way to “split” a clip that’s in the timeline (this would allow you to trick the title to appear on just the segment of the clip you wanted and would also be handy for attempting to simulate an insert edit.)

    Considering the type camera, and the prominence it was given in iMovie HD for the Mac, I’m surprised you do a simple 90 degree rotation of a clip. It’s fairly common that people using digital cameras to record video forget that it’s landscape only and shoot in portrait mode. iMovie HD “fixes” that easily. iPhone iMovie does not. I made that mistake twice while shooting this movie, luckily, you might think it was as artistic choice. It wasn’t.

    The clips audio can be turned on an off. There is no way to adjust the volume so you cannot normalize the audio between one clip and the next.

    You can law down some audio, which can be either any of the themes’ music selections or anything from your iPod. You cannot place the music where you want it, it simply starts at the beginning of the project and moves towards the end.

    You also cannot insert audio from you voice note recorder and so cannot record narration and lay it down over the video, nor can you overlay audio from another movie clip. This means I had to narrate each shot as it was recorded, which is a very inflexible and inelegant solution.

    Rendering the video was also a problem. The 15 minute video is 1.2GB, the various clips used to make the video were closer to 2GB. With 6 GB free on the phone, I was unable to render the video. My phone ran out of space. I had to change my sync options and put far less of my music collection on the phone to get enough room to process the video.

    The quality of most of the video was really good and I have no complaints about the finished output (no complaints that couldn’t be explained by the lack of choices in the editing and shooting process.) For short, quick features, iPhone iMovie can produce a remarkably polished, but it is not suitable for much more. You can do much, much better by loading the footage into iMovie on a Mac and editing it there. You can’t do that in the field, though.

    Next, I might try editing it on the iPad.

    Oh, and here’s the movie:

    Bad Day in Phoenix from Lone Locust Productions on Vimeo.

    What to do when it’s 109ยบ outside, you’re off work for the day with nothing to do and you air conditioning goes out at home and won’t be fixed until the evening?

    That was my dilemma today. See how the Apple Store solved my problem of what to do!

    This video was shot, edited and rendered entirely on an iPhone 4 using iMovie. My intent was nothing more than experiment with the onboard features to see how robust they were.

  • Fusion Patrol Podcast Update

    FP-Podcast-Logo.jpg

    I’ve been reminded that I’ve been remiss about writing about my experiences getting the Fusion Patrol podcast up and running. I’d like to wait until I’m sure that everything is working right, but that day may never come!

    We’ve now put out 16 episodes spanning three continents and there have been some hard won lessons learned. I think, in fact, that I’ve forgotten much of the frustration, but I think I can remember what I need to impart.

    The fundamental flaw we’ve had has been in sound quality. I suppose that goes without saying for an audio-only podcast.

    Perhaps it will be easier to explain if I describe our setup. Ben and I conduct the podcast over Skype from our respective homes. Ben uses a PC, which plays little or no further part in this story. I do the recording on my end on my Macbook Pro.

    Skype does not natively record phone calls and I purchased a piece of software called Call Recorder, which plugs into Skype and can record all Skype audio. Unfortunately, there is no distinction between callers. Skype turns both ends of the call into one audio stream.

    In our first episode, Ben’s audio was of poor quality and mine sounded good. This was really surprising because, while in the conversation, it sounded great to us. It wasn’t until we listened to the playback that the problems were obvious. A little (read: a lot) post-production magic improved things, but it was clear Ben needed a better microphone/headset. I gave him mine and I bought a new, USB headset. I chose USB because… I don’t really know why. It seemed like the thing to do at the time.

    For the next few podcasts, my audio sounded clean, but was extremely low in volume, week after week I was forced to spend hours attempting to balance the audio, manually raising and lowering the volume of each sentence spoken. Weirder still, my voice seemed to get quieter and quieter as each podcast progressed.

    I decided I didn’t like my USB headset and preferred the quality of the original mic that I’d given Ben, so I bought another one, which has separate input/output plugs. My audio seemed to get even quieter.

    It turns out the new microphone (and possibly the original that I gave Ben) is not powered, but a Macbook Pro doesn’t have a microphone in, it only has line in, which won’t work with an unpowered source. What was happening, it seems, was that I was actually recording though the built-in microphone on the Macbook Pro. As the podcast recording session would progress, I would begin to fidget and get further and further away from the Macbook, thinking that I had the microphone suspended in front of my face. The Macbook’s built-in noise-cancelling microphone is really good for telephony chatting but not what you need when podcasting.

    When I discovered the problem I had a dilemma. I was in Taiwan and my options for buying and testing equipment were limited. I discovered, though trial and error, that the Macbook Pro’s headphone jack is actually the same audio in and out jack that is on an iPhone, and as I had my iPhone headset, I used that for one podcast. The microphone quality wasn’t as good, but it was definitely not going through the laptop’s microphone.

    Having finally solved my problems, I was devastated to find that still my audio faded away as the podcast progressed. What could be causing it?!

    About this time I also discovered a piece of software called “The Levelator” which automatically does something similar to what I was doing manually by raising and lowering the volume. It does a remarkably good job, but not good enough. I found myself using the Levelator and then tweaking the final results, which did make for a lot less work for me.

    Perhaps belatedly, I began searching for other possibilities as to what the problem and I came across a possibility. It seems that the Mac version of Skype differs from the PC version of Skype inasmuch as the Mac version always has auto-level control enabled and does not have user-accessible option for turning it off. With that knowledge in hand I conducted some tests and, sure enough, if I would make a slightly louder sound, the Mac’s audio input control would be lowered by Skype. Oddly enough, the so-called auto-leviling never raised the volume when it got too low. In the essence, it simply kept lowering the audio and never raising it back up. By the end of a podcast, my audio input was down to nothing.

    With a little checking online, there are some hidden control XML files for Mac Skype that you can edit, adding in some commands that will disable the level control.

    Thinking I’d solved that, my next task was to try to find a plug adaptor that would take the in/out plugs from my headphone and neatly combine them into a standard iPhone style jack. Despite the millions of iPhones out there, I couldn’t find such a device, save for one company that makes equipment for court stenographers. Being such a vertical, captive market, their prices were not realistic to my budget. As a fallback, I purchased an iMic, which is a audio in/out to USB converter, effectively turning my new headset into a USB headset. (You might think I’d just go back to the USB headset, but it really does have a poor microphone.)

    With no auto-leveling and proper microphone placement, things seemed perfect, just in time for our (extended) discussion about Doctor Who with our guest Simon from the UK, who also joined us via Skype over our first ever three-way Skype conversation.

    That was quite a day. We’d expected to talk around 90 minutes but ended up talking for over 4 hours. It wasn’t easy scheduling a time when everyone was available and just 30 minutes before the appointed time, my neighbors began mowing their lawn. I was worried that the lawnmower would interfere with the audio. It did, but only indirectly. They were done long before the podcast started but the gunk tossed up in the air began to slowly, almost imperceptibly to me, clog up my sinuses. My breathing became somewhat more labored than normal. This is fairly common for me and I rarely notice it. Little did I know how horrible it would be!

    With my audio now solid and uninterrupted, I should have realized Sod’s Law would take full effect and Ben and Simon’s audio would be very low. Once again, for the four-part podcast that it turned out to be, I was forced to raise and lower the volume on a sentence by sentence basis. It would have worked, except… for my sinuses which continued to labor away while they were talking. When I’d raise their audio, so my belabored breathing got raised up as well.

    Once or twice during the long podcast, I no doubt bumped my headset, lowering the microphone closer to by breathing, making it worse in some parts of podcast.

    It’s all horribly, horribly embarrassing.

    While our most recent Podcast #16 wasn’t perfect, I did not have to extensively tweak the audio, although I did let the Levelator work on it, which seems a great improvement to me.

    What’s really needed is multi-track recording, but that seemed impossible with Skype. It seemed the only solution would be to find a way to bring my audio and Skype’s audio into a mixer before being recorded. Ideally we’d bring each participant into a different input to the mixer and then I’d be able to adjust each audio source independently in GarageBand in post production. That’s an extensive hardware solution that I was just not willing to invest in.

    But just yesterday I read an article about a piece of software called Wiretap Anywhere from Ambrosia Software that sounds like it may be the very solution I’ve been looking for.

    Wiretap Anywhere allows you to create virtual multi-channel audio devices from any number of hardware and software sources. For example, you could put the audio input from the computer’s microphone, iTunes, a USB microphone and Skype output as four stereo inputs into one virtual device. That virtual device can then be used as an 8 channel input device into GarageBand (or any other input capable destination). GarageBand can only use one input device, but it can record each of the channels independently (either individually as mono sources or as stereo pairs). In simple terms, it allows GarageBand to do multi-channel recording from practically anything that generates sound on your computer.

    They have a free 30-day demo and after a bit of trial and error, I was able to successfully record my end of a Skype conversation and the remote end as separate tracks: exactly what I’ve been wanting. The proof will be in using it in actual podcast conditions, but it looks like this might be the solution to one of our major difficulties.

    At $129 it’s a bit on the expensive side for someone like me that’s just podcasting with no major ambitions towards world domination, but on the other hand, if it keeps my blood pressure down, it’s worth its weight in gold.

    I’ll be testing the demo on the next podcast. Keep your fingers crossed.

  • The iPhone 4 Just Needs One Thing…

    IMG_0896 
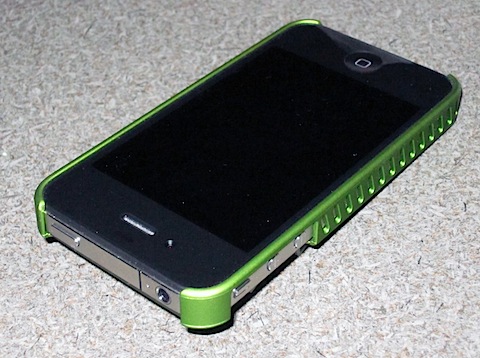
I just couldn’t afford to wait 4 weeks for my damn free bumper. The new smaller form factor caused the phone to slip out of my holster today. Can you imagine if I’d lost the phone? It’s not worth risking it, so I picked up one of the cheapest I could find at Best Buy and, frankly, it makes the phone 100% better.

    Not only did it completely resolve any variable signal issues, but it now fits in the holster and the unpleasant edges are softened just enough that the phone now feels great in my hand.

    Plus, it’s green and I like green. A Lot.

  • iPhone 4 and bumpers

    Back on July 17th, I ordered an iPhone 4.

    I knew about the so-called antenna-gate problem, and I waited until Uncle Steve gave the word for free iPhone bumpers/cases to mitigate the problem. I’d also been down to the Apple Store and checked out the issue myself. Even inside the Apple Store it was apparent that signal strength was distinctly altered by the way you held the phone, but, the potential for problem that this might cause versus the benefits was not sufficient to stop me from ordering one. Especially since I had always intended to have some form of bumper case on the iPhone 4. It was clear that Apple would be supplying free bumpers, but details of how that would happen were not yet announced.

    Now I can tell you why their plan blows.

    I was given an estimated delivery date of August 12th because of the backorders! I would have ordered a bumper at the same time, but they weren’t available to be ordered (for free of for cost) because of the pending free bumper program.

    So, would I just get a bumper along with the phone? No, when the details of the program were released, it turns out you have to download an app for the iPhone 4 and order from there. I heard a lot of people say how clever that was. Bullshit, it was.

    Until I received my phone, I wouldn’t be able to order the (necessary) bumper. Inconvenient, but I supposed I would be able to live with it for 3 or 4 days until my bumper could arrive after I ordered it.

    Last Monday I received shipment notification that my phone had left China, arriving on August 9th, although the Fedex website said August 10th. It arrived in Alaska by Wednesday and there it stayed, and was, according to their site, still in Alaska when I left work Friday afternoon. Imagine my surprise when it was sitting in my house when I got home 30 minutes later!

    For grins, I checked the Fedex website and my phone was still in Alaska. 2 hours later and the website was updated to show that it had been traveling down the coast since Wednesday.

    My first order of business was to get the phone activated. When you upgrade an existing phone via mail order, when the new phone is plugged in, it automatically transfers the service from the old phone, and this process was fairly painless. My old phone shut down within 5 minutes and my new phone activated within 5 minutes after that. I restored the backup from my old phone and that, ultimately, took many hours. Once it started to sync music, I got bored with watching my new phone do nothing and cancelled the sync and saved it for bedtime.

    Once the phone was in my hands, I started checking all my applications. All my passwords were gone, but that’s a minor inconvenience and probably a “good idea anyway”. Once I got that sorted out, we went out to dinner for some field testing.

    Without a bumper, in places, I’m having significant problems with signal strength. On some occasions, when I pull the phone out of the holster, I have no 3G and No Service, which is well frustrating. Setting the phone on the table resolves the problem.

    It was imperative that I order my bumper right away. Here’s why the program blows. I’ve already waited 3 weeks for the phone, which I have to have before I can order the bumper. Now, I have to wait another four weeks for the bumper! They need to get phones and bumpers into the customers’ hands at exactly the same time.

    I’ve tried using a piece of plastic film over the sensitive antenna areas, and that helps, but it won’t stick, so I’m left holding my phone gingerly and awkwardly, or learning to type left handed while I wait for a glacially shipped bumper.

    Enough griping about the bumper issue, lets talk about the phone.

    I’m not a fan of the new form factor, which surprises me. I think I preferred the rounded edges. That said, the unit feels firm and solid in your hand, even a bit heavier than the old 3GS, but that may just an illusion. I do like the new buttons.

    The new Retina display is awesome. Everything looks crisp and sharp. Even under a loupe it looks great.

    The “new” camera produces nice pictures, but the flash and video light has a bluish cast to it. Still, it’s better than nothing. The distance of the flash seems pretty short, but adequate for shots in dark restaurants. There’s a certain quality of being lighted by a flashlight to it. The HD video is very nice, but I’ve yet to determine how much video I’ll actually be able to record, since my phone is perpetually 95% full of music.

    Phone calls… I don’t know. I’m not due to make a phone call for a another few days. I’ll let you know when I’m forced to talk to somebody on the phone.

    The processor is zippy and it feels as quick as the iPad.

    Finally, the big thing is supposed to be battery life. It’s better. Difficult to quantify, though. Last night at about 11, my phone was down to 39% and I hadn’t done a lot of driving (My car stereo charges my phone) so that’s probably a bit better than the 3GS, but I’ve not suffered from the battery problems that other people report, perhaps because I don’t waste my time talking on the phone. I have noticed that when the 3GS has bad signal, batery life is seriously degraded. Since I don’t have a bumper and my signal is all over the place, my battery life may not be up to the capacity it would be if I had a bumper.

    I want my bumper.

    IMG_0005 IMG_0006

    IMG_0008 IMG_0007